

Please read my **TERMS OF USE** before doing this tutorial.
Thanks! Auntie Em
This tutorial assumes you have a basic knowledge
of the workings of Paint Shop Pro.
Made with PSP version 6.0.
If you have not worked with vectors before,
you should visit "Spike" to learn all about this feature of PSP.
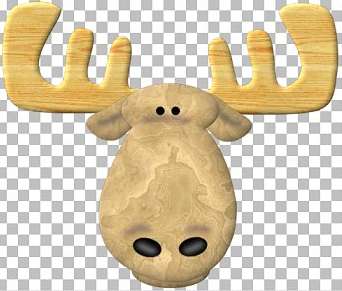
I used these three images to floodfill areas of the moose.
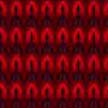
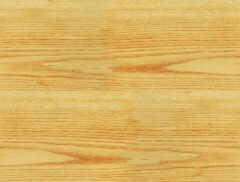
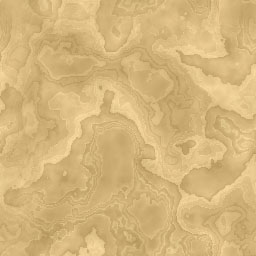
Just right-click on them and save to your harddrive.
For more great woodgrains and textures, please visit the site where I found them.
This tutorial is dedicated to ThatKyLady, my best friend and *twin*. *LOL*
Thanks for sticking with me, sis.
A big thanks also to Liz ;-) for the test drive! *g*
Step #1. . .turn on puter!
Now...on to Mr. Moose!
Open those floodfill images in PSP and minimize them
for use in just a little while.
Open a new image, transparent background, 500 X 500 pixels.
This will give you plenty of room to work.
Set your foreground color to black.
Go to preset shapes tool.
Shape = ellipse.
Style = filled
Line width = 1
Antialias = checked.
Create as vector = checked.
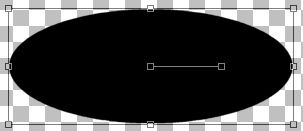
Start at the center of your image form and draw an ellipse, like this:
Now, to make half of our antlers, we have to add nodes and do some shaping.
To add nodes, go to Vector Object Selection tool,
then to the control box and click on Node Edit.
While holding down the Control Key,
click the cursor at two spots on either side of the top center node
and once on each side of the bottom center node.
This will add new nodes to the image.
Feel free to use more or less as necessary.
This is the hardest part of the tutorial to do.
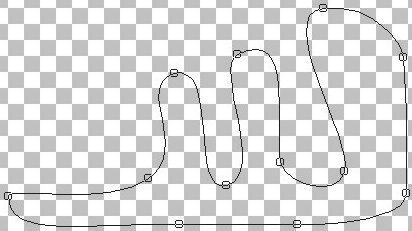
You will now start to shape the antler using the little "handles"
to form the three lobes of the antler.
I try to keep the bottom line fairly straight during this process.
It's hard to show you exactly what I did, but I'll try to get you started:
You will have to adjust the other nodes to make the next two lobes
of his antlers. May have to pull the other handles outwards and turn them
to get nice rounded tops.
Make one lobe bigger than the other two so that it looks more "mooselike".
You want a long narrow left side to this shape...
it will be covered by the head shape later.
Adjust as much as you need and check the shape by right-clicking
and choosing Quit Node Editing.
Go back to Control Box and Node Edit for more adjustments.
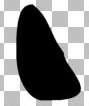
Here is what my final shape looked like for the right antler:
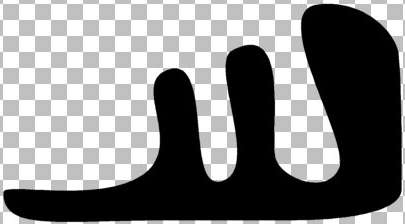
When you are satisfied that you have a nice antler shape,
go to Layers > Convert to Raster (accepting the default settings).
Now, lets make a complete set of wooden antlers for Mr. Moose!
Go to Image > Resize > 75% or 80% (depending on what works for you)
Resize All Layers = unchecked
Click OK
Image > Sharpen > Sharpen
Edit > Copy > Edit > Paste as New Layer
Image > Mirror
Image > Sharpen > Sharpen
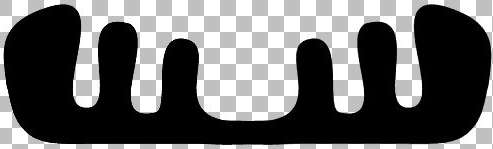
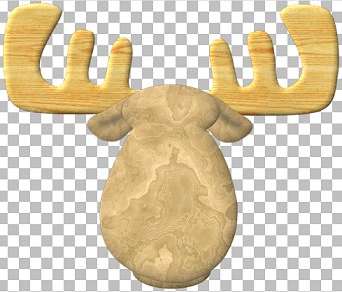
Now, slide the second antler you just made into place to the left
and overlapping the first antler,
with the bottom aligned as best you can.
Don't worry if the bottom of the antlers is not straight enough...we can fix that soon.
This is what you should now have:
If the bottom edge of your antlers isn't quite straight, just use the Selection tool.
Shape = Rectangle
Feather = 0
Antialias = checked
Select just the bottom edge of the antlers that is not straight
and go to Edit > Cut
That should take off any curve that wasn't looking good. *g*
Now turn off your bottom layer (the transparent one)
make one of the antler layers active and go to
Layers > Merge Visible.
Now, using the same settings on the Selection tool, surround your antlers
with a rectangle and click in the middle of it...on the antlers.
They should now be selected...*marching ants*.
To put the woodgrain on them, go to the Flood Fill tool and on the control box
Your settings should be:
Fill Style = Pattern
Blend Mode = Normal
Paper Texture = None
Match Mode = RGB Value
Tolerance = 100
Opacity = 100
Sample Merged = unchecked
On Flood Fill Options on the Control Box...the little grid looking tab,
use the drop-down menu to select the wood fill for the antlers.
Click on the antlers to fill them.
Leave selected.
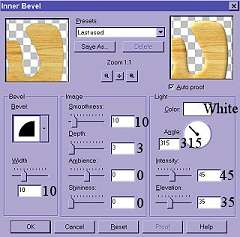
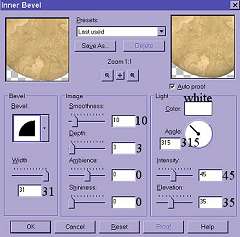
Go to Image > Effects > Inner Bevel with the following settings:
Deselect.
If you've made it this far, then things get a bit easier to do.
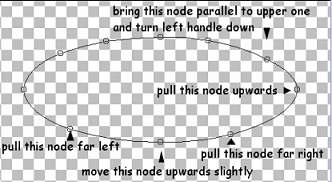
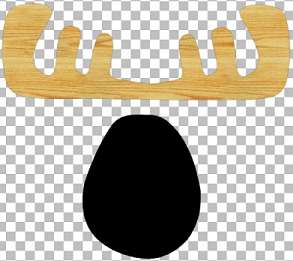
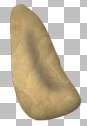
For the Moose's nose you need to make another ellipse, this time, an upright oval.
Using the Vector shape again like we did before,
add just a couple of nodes and deform it to this shape:
Layers > Convert to Raster
Add a new layer.
Now for the top of his head, make still another ellipse above the nose.
Create as Vector = unchecked
Thank goodness, you don't have to shape this one!
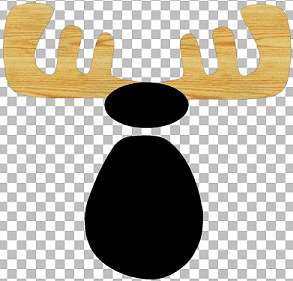
Slide the two new layers, nose and top of head into place over the antlers.
Turn off bottom layer and antler layer and make the nose layer active.
Layers > Merge Visible
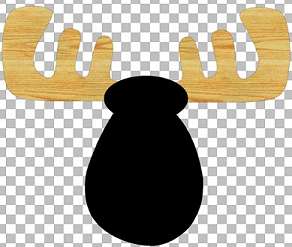
Floodfill this layer in the same way we did before
this time using the "burl-looking" wood fill.
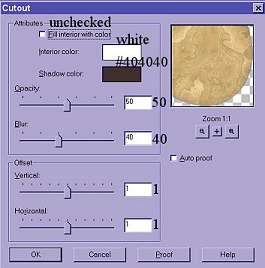
Apply a cutout to the head layer only...Image > Effects > Cutout
using the following settings:
Now we need an inner bevel on that head to make it look more round:
He needs some ears, so now make a vector ellipse off to the side
Add a node or two and deform it to an "ear" shape.
Quit Node Editing and Convert to Raster Layer
Select as before by surrounding with selection rectangle and clicking on ear
Floodfill with same "burl wood" fill
Apply same cutout and inner bevel as before
Leaving the ear selected, add a layer.
Using the Draw tool:
Color = #404040
Type = freehand line
Style = stroked
Width = 6
Antialias = checked
Draw a line on the ear to give it some inner form.
Blur > Gaussian Blur > Radius 5
Deselect.
Now merge the two layers with just the ear parts on them.
On the layer pallette, drag this layer below the moose's head.
Using the Deformation tool, rotate the ear to the left a tiny bit,
and slide into place behind the head.
Image > copy
Image > paste as new layer
Image > mirror
Image > sharpen > sharpen
Slide this second ear into position also.
To make a lower lip, create another small, narrow ellipse.
Floodfill, apply cutout and inner bevel as we did before,
Slide this layer below the head layer and into place,
leaving just the bottom edge of the ellipse visible.
Time to make nostrils for this fellow.
Turn off all layers except the head layer and make it the active one.
Add a layer.
Using the Preset shapes tool, make a small black ellipse.
Rotate it and slide it into place with the Deformation tool.
Select it as we have been doing and add another layer.
Using the Draw tool and a light grey, draw a line within the ellipse shape.
Image > blur > Gaussian blur > radius 5
Turn off head layer and merge the two nostril layers.
Deselect.
Copy > Paste as new layer > Image > mirror.
Move this second nostril into place.
Turn the head layer back on and select it as we have been doing.
(by surrounding it with the Selection tool rectangle and clicking on it)
Add a layer and with the draw tool and a medium color brown,
Draw three lines...one above each nostril
and one just below where the eyes will be.
Image > blur > Gaussian blur
Merge these layers: the head, nostril and shadows we just added.
I wanted my moose to have "beady little eyes" *LOL* so...
...add a layer and using the Preset Shapes tool draw a small black circle.
Copy and paste it as a new layer next to the first one.
See...two beady little eyes...you can add a couple of dots of white
if you don't want them quite as "beady" looking.
Again, merge visible the eyes with the head layer.
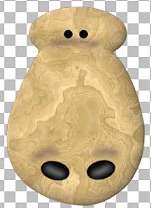
Hang on, we're almost there!
Turn on all your layers and this is what you should have:
If he's going to be a moose "rack", you need knobs on his antlers.
I made mine as a tube so that I could resize it as necessary.
Minimize your moose for a moment and open a new image, transparent,
200 X 200 in size and use the Selection tool to draw a circle, antialias checked
in the center of the canvas.
Floodfill it with the same wood used for antlers.
Apply an inner bevel changing only one of our settings...width = 12.
Deselect.

Export as a picture tube and add drop shadows as needed when you apply
the knobs on new layers (so they can be moved and adjusted) onto the antlers.
Bring up your moose image again.
One more thing and we are all done...*g*...his tasteful red knit cap!
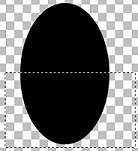
Add a new layer and draw black ellipse the size you need.
Surround the bottom half with the rectangle selection and cut,
leaving just the top half of the ellipse.
Just below it add a new layer and a rounded rectangle shape.
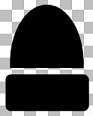
Floodfill each layer's image with the red knit pattern.
Slide the brim into position onto the top.
You can use the deformation tool and give the top of the hat some "tilt"
by holding down the shift and control keys while you move the top left
corner of the tool to the left.
Apply deformation.
If you want to add some shading to the hat, just do what we did before:
Select the portion of the hat, the brim or the top, and add a layer.
Draw lines and apply Gaussian blur.
Merge the hat layers only and make sure it is positioned the way you want it.
You could also make this hat on a separate form and export it as a tube too.
Add a drop shadow under the hat.
*whew* We made it!
Now, you can put the knobs on his antlers and
hang some decorations from them or just leave him "as is".
Be sure to add some drop shadows in the right places as you put things together.
I always save a copy "in layers" as a PSP image and "shift D"
for a working copy.
You can add a background layer behind him or merge layers and paste onto one.
Here is that wonderful Log Cabin background:

Just right click and save to your harddrive.
Back
tutorial and graphics © Auntie Em 2001-2007