Please read my **TERMS OF USE** before doing this tutorial.
Thanks! Auntie Em
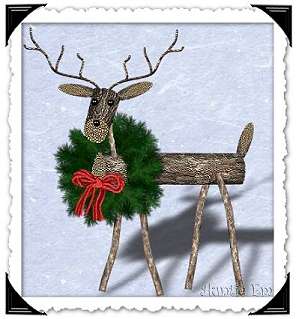
I had so much fun writing the tutorial for Mr Moose
that I decided to try making a deer out of logs!
I've always wanted one of these...even if it is only a *cyber-deer*!
This will give you an idea of what I did to make this fella,
of course, you can use the instructions to make your own *special* version.
That's what is so much fun...seeing what "you" do with him! *g*
OK, time to get going!
This tutorial assumes you have a basic knowledge
of the workings of Paint Shop Pro.
Made with PSP version 6.0.
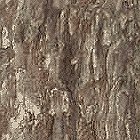
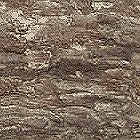
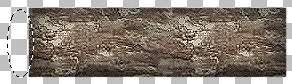
You will need the following images for floodfills,
so please right-click on them and save to your harddrive.
Bring them up in PSP and minimize them.
You could also use any bark or cracked wood image you choose.
I didn't use any filters at all in making the deer,
but the cracked wood fill is made by using Xenofex
and the Baked Earth setting over a light wood grain.
You can make your own fills if you want to try something different!

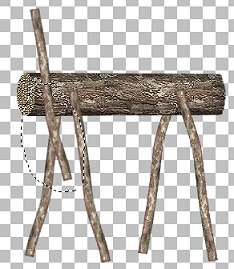
To make him, we have to make four tubes for his various parts
and then put them all together at the end.
I started by bringing up a 400 X 300 pixel image form (transparent).
Add a layer.
Layers > New Raster Layer (accepting the default settings)
Using the Selection tool...
Selection type = rectangle
Feather = 0
Antialias = checked
...make a rectangular selection about 250 pixels wide by about 65 pixels high.
To fill it with bark, go to the Flood Fill tool.
On the control box your settings should be:
Fill Style = Pattern
Blend Mode = Normal
Paper Texture = None
Match Mode = RGB Value
Tolerance = 100
Opacity = 100
Sample Merged = unchecked
On Flood Fill Options on the Control Box...the little grid looking tab,
use the drop-down menu to select the bark2.jpg for the log.
Click on the rectangle to fill it.
Leave selected.
Add a layer.
Apply a cutout using the following settings:
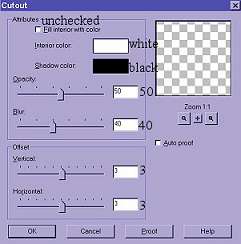
Leave selected and add another layer.
Apply a second cutout,
changing only the vertical and horizontal settings to -3 (negative three).
Deselect, turn off the transparent background layer,
activate one of the other layers,
and merge visible the three layers of the log.
Layers > Merge > Merge visible.
Add a new layer.
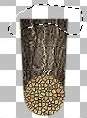
Using the Selection tool again, selection = ellipse,
make a narrow upright oval selection on the end of the log.
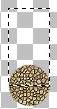
Floodfill the ellipse selection with the crackedwood fill.
Don't worry if your ellipse is too big or too wide,
you can correct by using the Deformation tool.
Go to: Image > Sharpen > Sharpen after using this tool to adjust it.
Deselect and slide it into place on the end of the log,
adjusting it as needed with the Deformation tool.
Layers > Merge > Merge visible.
Now, it's time to use the Freehand selection (lasso) to shape
the other end of the log.
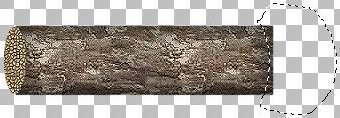
As you can see, I just made a curved selection on the other end
And extended it out and around to close the selection.
Now go to Edit > Cut, and you should have a rounded looking end on the log.
If it doesn't look the way you want it, just undo and try again.
I had to do it several times to get just the right curve.
Deselect.
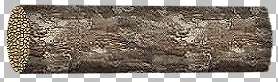
To make it look a bit more realistic, I think it should taper a little.
Using the Deformation tool, hold down the Control key,
and bring one of the right hand corners down just a bit.
I do mean just a teeny, tiny bit! Not too much!
Apply deformation.
When you have it the way you want it,
making sure the transparent layer is still turned off,
go to:
Image > Sharpen > Sharpen
Edit > Copy
Edit > Paste as New Image
File > Export > Picture Tube
The log is now the first of your four new tubes.

Let's make the second tube now, the one that will be our deer's ear...
...*g* and his tail too!
Bring up a new image form, 200 X 200.
Add a layer.
Using the selection tool:
Selection type = ellipse
Feather = 0
Antialias = checked
Draw a sideways oval about 125 X 25 pixels in size.
Floodfill it with our bark2 fill.
Deselect.
Add a layer.
Make a smaller oval selection on the right side of this bark ellipse.

Now floodfill it with the crackedwood.
Deselect.
Adjust if necessary with the Deformation tool.
Merge visible layers and export it as a tube.
Edit > Copy
Edit > Paste
File > Export > Picture Tube
Our third tube will become the deer's head.
Bring up a new image form, 300 X 300 and with the Selection tool:
Selection type = circle,
Feather = 0
Antialias = checked
draw a circle approximately 35 pixels round and
floodfill with the crackedwood pattern as we did before.
Add a layer.
Using the Selection tool rectangle, now draw a rectangle over the filled circle.
Bring up the bark2.jpg in PSP and go to:
Image > Rotate > Right 90 degrees
Minimize it again.
You will have to re-select it again in the patterns
to get the right grain direction for the fill.
Floodfill the rectangle with the *vertical* bark2 fill.
Leave selected and add two layers and cutouts like we did for the first log.
Deselect.
Turn off the layer with the filled circle
and merge visible these three layers.
On your layers pallette, drag this layer below the crackedwood circle layer.
The Deformation tool "is your friend"...*LOL*
...and you can use it to adjust this layer to fit the end of the log.
Now, you use the Deformation tool, while holding down the Control key,
to go to one of the back corners of the bark layer
and ease this outward just a slight bit to give more perspective to it.
Layers > Merge Visible
Now, use the Lasso and Cut to do the same type shaping as we did before:
Time to export this as a tube to be used for the deer's head.
Edit > Copy
Edit > Paste
File > Export > Picture Tube
Time to make that last tube and it will become the deer's leg.
Bring up a new image form, 200 X 400 pixels in size.
Add a layer.
Make your foreground color Black.
Using the Draw tool:
Type = Single line
Style = Stroked
Width = 18
Antialias = checked
Endcap = straight (the second little tab...far right setting)
Draw a vertical line, trying to get one with a few slight curves to it.
Remember that Undo button if you don't get what you want first time!
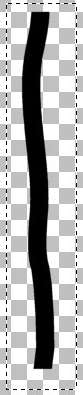
Surround it with the rectangle selection and click on the line.
I will now be selected for you to floodfill it with the bark1 fill.
Leave selected and go to:
Image > Effects > Inner bevel
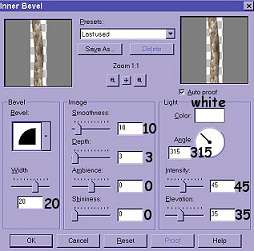
Deselect and export as a tube.
Time to put all those parts together!
Bring up a new image form, this time make it 500 X 500 pixels.
Add a layer.
Remember I told you the Deformation tool is your friend? *LOL*
It will come in handy for adjusting the various parts.
Remember to "sharpen" if things get a bit blurry after using it.
Stamp your first log tube on this layer and lengthen it
with the Deformation tool if it looks too short.
Add a layer.
You will have to adjust the size of the tubes we made
to keep them in proportion to the body of the deer and its head.
Stamp one of the legs that we made on this new layer and slide into place.
Add another layer and another leg tube.
I used:
Image > Flip
Image > Mirror
and added layers for each leg.
to put all four legs in place the way I wanted them,
and dragged the two back leg layers under the body of the deer.
To make his neck, I activated the top layer and added another layer.
Then I stamped one of the "legs" onto the image and rotated it a
tiny bit
With the Deformation tool...careful, it's tricky with a narrow one!
Then use the lasso to cut off just the bottom of that leg, to make
the neck portion look like his neck.
Add another layer and stamp the "head log" onto it, again,
using that handy-dandy Deformation tool to tip it to a slight angle.
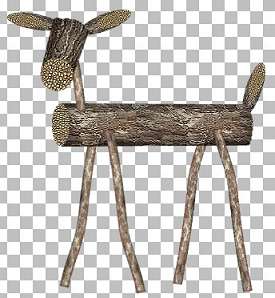
Beginning to look like something, isn't it?
Now add a layer for each ear and the tail, stamping the ear tube on them,
And rotating them and sliding into place with your Deformation friend!
Drag each of those last layers below the body and head of the deer.
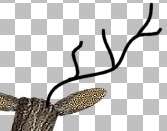
Antlers? You want a buck instead of a doe???
OK...it's easy!
You can use a tube of a real tree branch for the antlers,
Or do what I did.
I added a layer on top and using the Draw tool:
Type = Freehand line
Style = Stroked
Width = 3
Antialias = checked
Endcap = Rounded
I drew a nice "antler" on one side.
I surrounded it with a selection rectangle,
clicked on it and floodfilled it with bark1.
Then, while still selected, put an inner bevel on it
with the same settings except for a width of 3.
Then I copied it and pasted it as a new layer and mirrored it.
Drag both antler layers under the head layer and you've got it!
I added a black button tube for his eyes and nose,
but it's up to you to decide what to try for them.
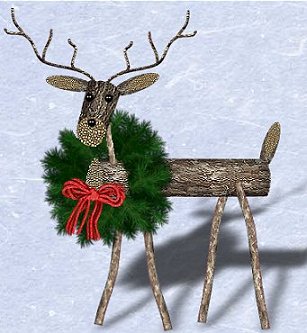
You can now merge visible all the layers and export the deer as a tube.
Stamp him on any background and decorate him as you wish!
I added a wreath, a bow and an Eye Candy perspective shadow.

Back
tutorial and graphics © Auntie Em 2001-2007